When creating an email, it’s important to remember that it shouldn’t just be a wall of text. Adding your logo or images can make the email more visually appealing. If you’re using LenzVu’s email template designer, here’s how you can add and edit the size of images.
Uploading an image #
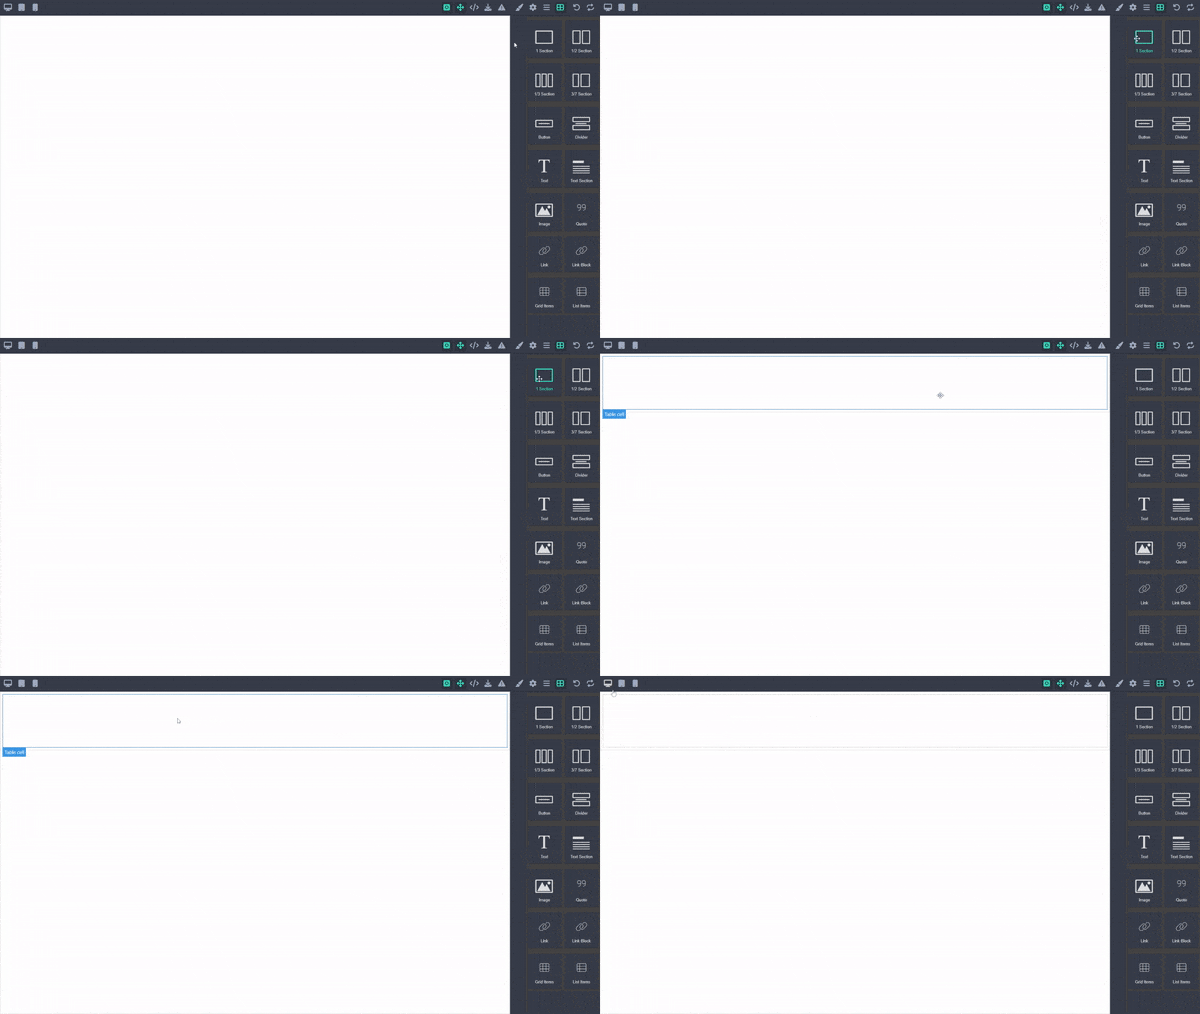
First, we will start by entering full-screen mode by clicking the icon with the four arrows going outward. This can be located on the left-hand side.

Now that we’re in full-screen mode click and drag the section widget from the tool box on the right.

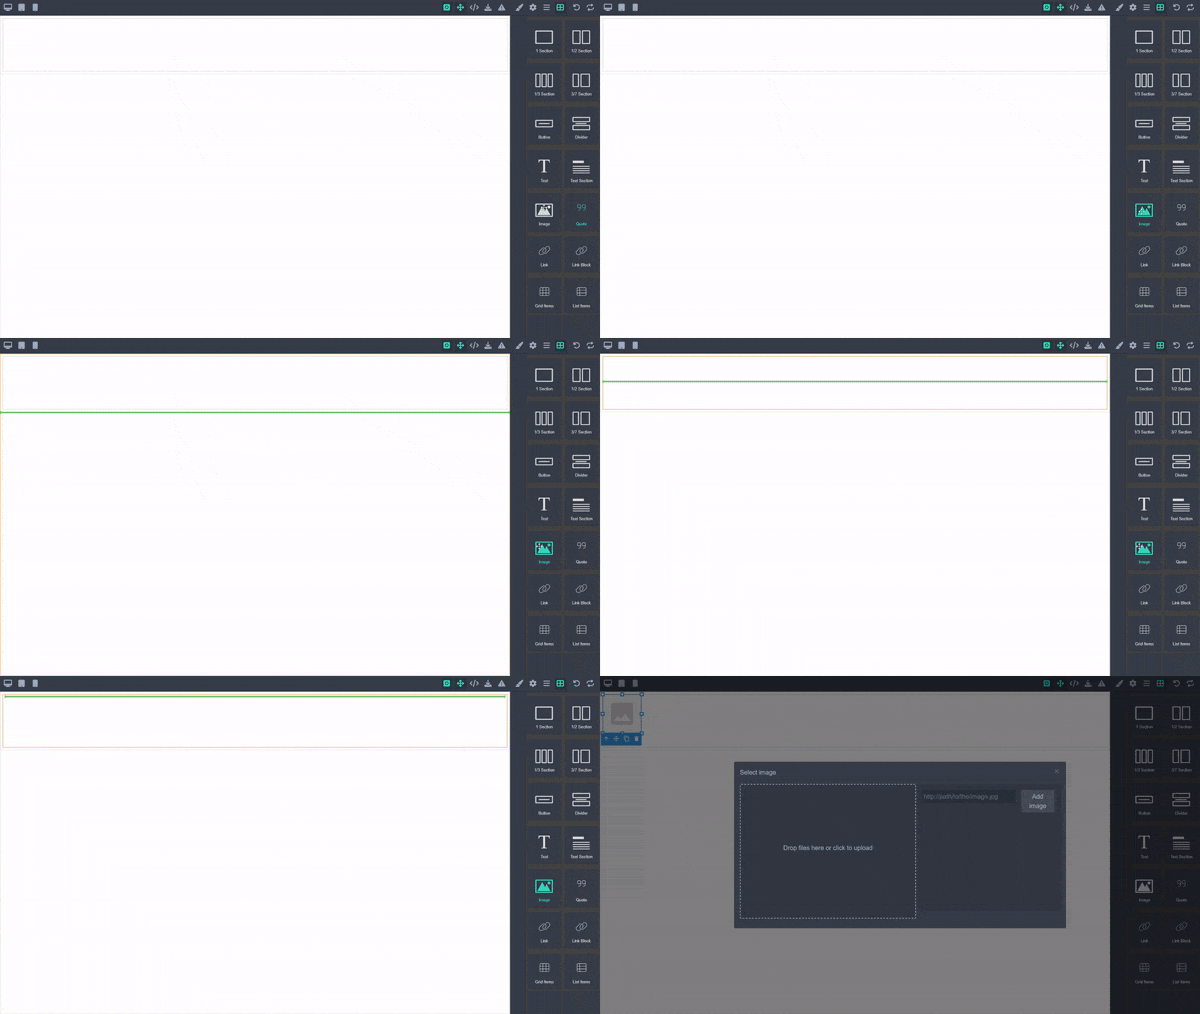
Next we’re going to upload our image with the image widget by dragging it and dropping it into the new section. The green line shows you where the image will be placed on the page.

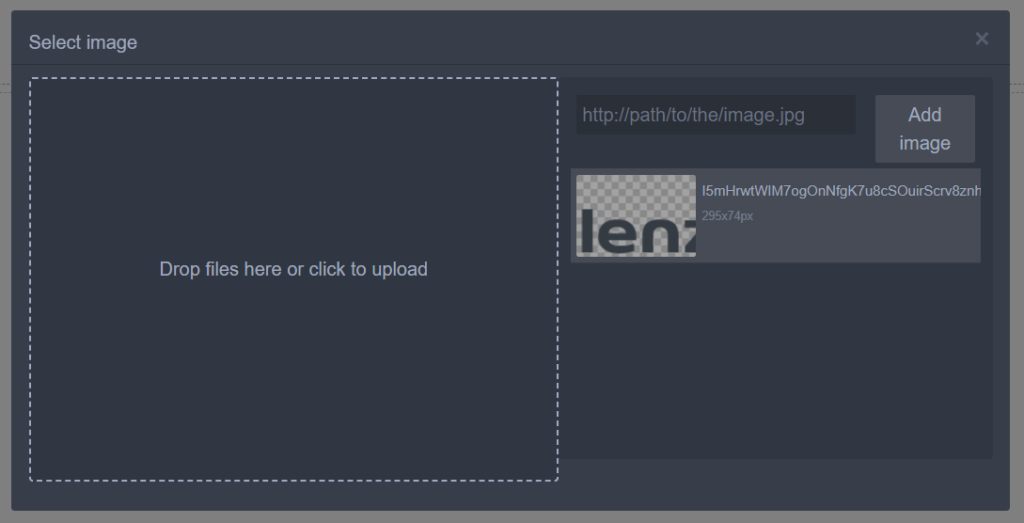
You will now be prompted to upload and add an image. First, click on “Drop files here or click to upload”.
Once your image is uploaded feel free to click on your image and then press “add image”.
You can now close this popup.

Change the size of the image #
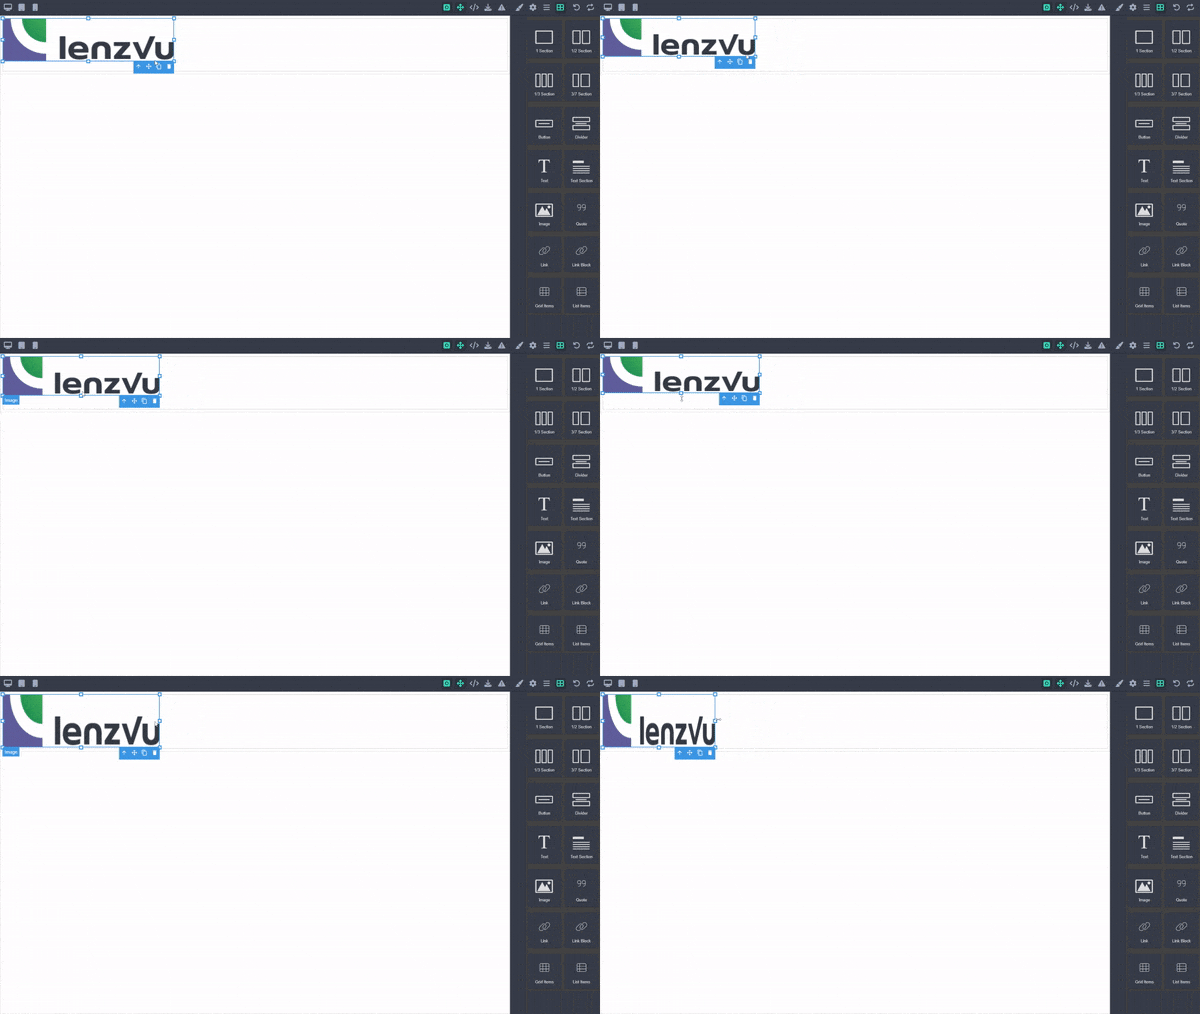
To change the size of an image simply click on the image. Then click and drag one of the white squares that appear and resize to your desired size.

Change the position of the image #
To change the position of an image click an empty space of the section the image is in and then select the style manager which is indicated by a paint brush.

From there select “Typography” and then go to “Text Align x” and set the alignment to center by clicking the option.

Congratulations! You’ve learned how to upload and edit images in LenzVU’s Email Template Designer. click here to learn more about our tools!


