Class reminders can be incredibly helpful in ensuring that members receive timely notifications about upcoming classes, reducing the risk of missed sessions and enhancing attendance rates, ultimately leading to improved client engagement and retention. Additionally, this automation saves staff time and resources by automating the reminder process, allowing them to focus on other important aspects of studio management.
Step 1: Create Automation #
Select the automations tab on the left side of the page but this time select automations. Now click on the create automation button at the top right hand side of the page.

Step 2: Set an Entrance Condition #
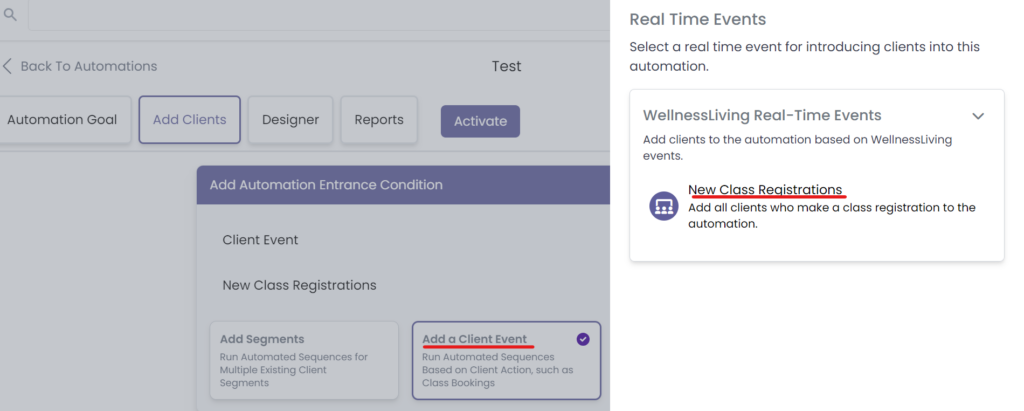
Start by clicking on the add clients tab and select the +Add a Real-Time Event feature for the automation entrance condition. From here choose New Class Registration under WellnessLiving Real-Time Events.
Step 3: Build The Automation #
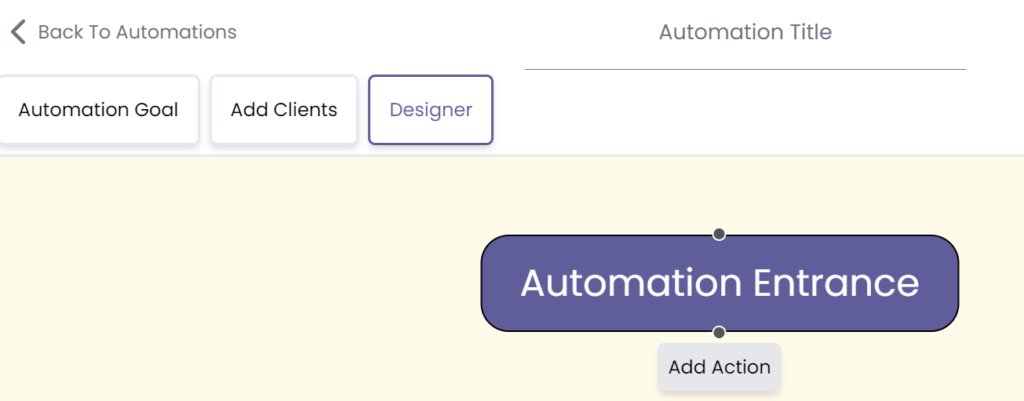
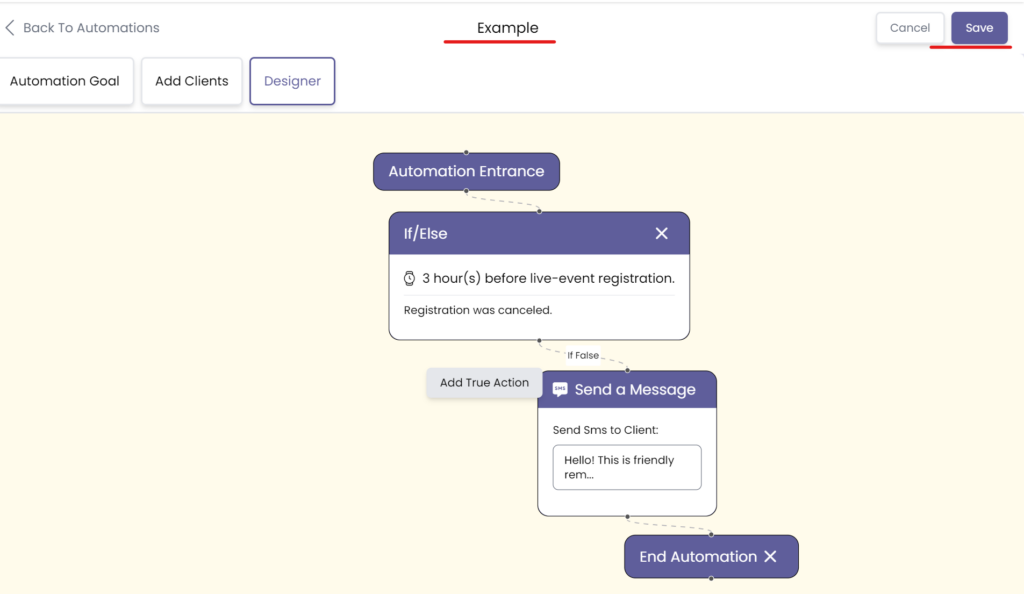
Now go to the Designer tab and select the Add Action button to build the automation.
Head to the Workflow tab and select the if/else feature.

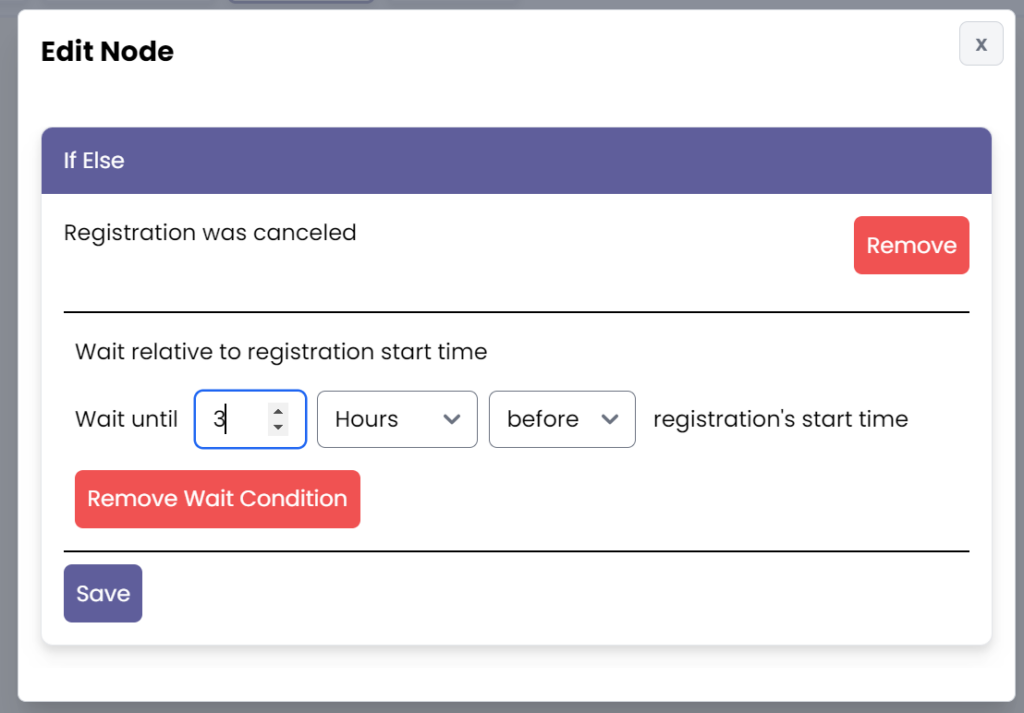
Double click that created action and set the if/else condition to Registration Canceled under the Client Events Only tab. Now add a wait condition by selecting the blue lettering and setting it to Before/After Class Start Time under Client Events Only. Set it to the intended amount of time before the class you want your clients to receive a class reminder. Make sure to click save.
Now select Add False Action below and select the Communication tab where you choose to either Send an Email, Text Message, or both. MAKE SURE: To select Add False Action to ensure clients that haven’t canceled received the reminder.

Now double click the created message, input the intended text into the text block.
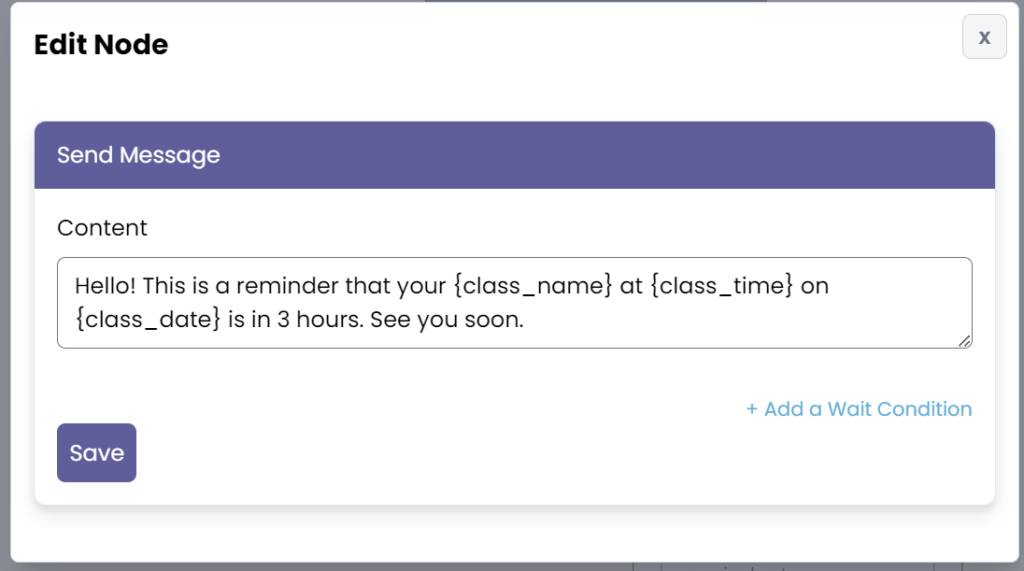
Now save the message and add the final action within the Workflow tab: End Automation.

Step 4: Save and Activate #
Finally, add a title for your automation, click save, and go back to activate it when you are ready.
Congratulations on getting to know how to set up our class reminder automation!


